
We love eggs at our house and it them in a variety of ways. Lately I have been keeping a bag of these perfect boiled eggs in the fridge to be enjoyed as a quick breakfast (we like it mashed with a fork with salt, pepper and butter and warmed in the microwave), on a salad or a simple snack. For some reason making good hard boiled eggs was a mystery for me! I know that it doesn’t seem like there should be much to boiling an egg, but I was running into a few annoying problems: an unpleasant greenish color around the yolk. shells that would not come off without pulling chunks of the whites with it, and dry, chalky yolks. Have you experienced those irratating results too? Well, I was tired of it and since my family was requesting hard boiled eggs so often, I had lots of practice to get it right:) Through trial and error and a little research I have found the easiest and most effective method that results in perfectly boiled eggs. I thought this would be a good time to share these tips since so many of us will be boiling LOTS of eggs for Easter! My boys can not get enough of dying eggs! We end up coloring DOZENS! Also, please share if you have any additional tips or tricks–we love to hear them!
Other Recipes to try
Egg salad with avocado
Print
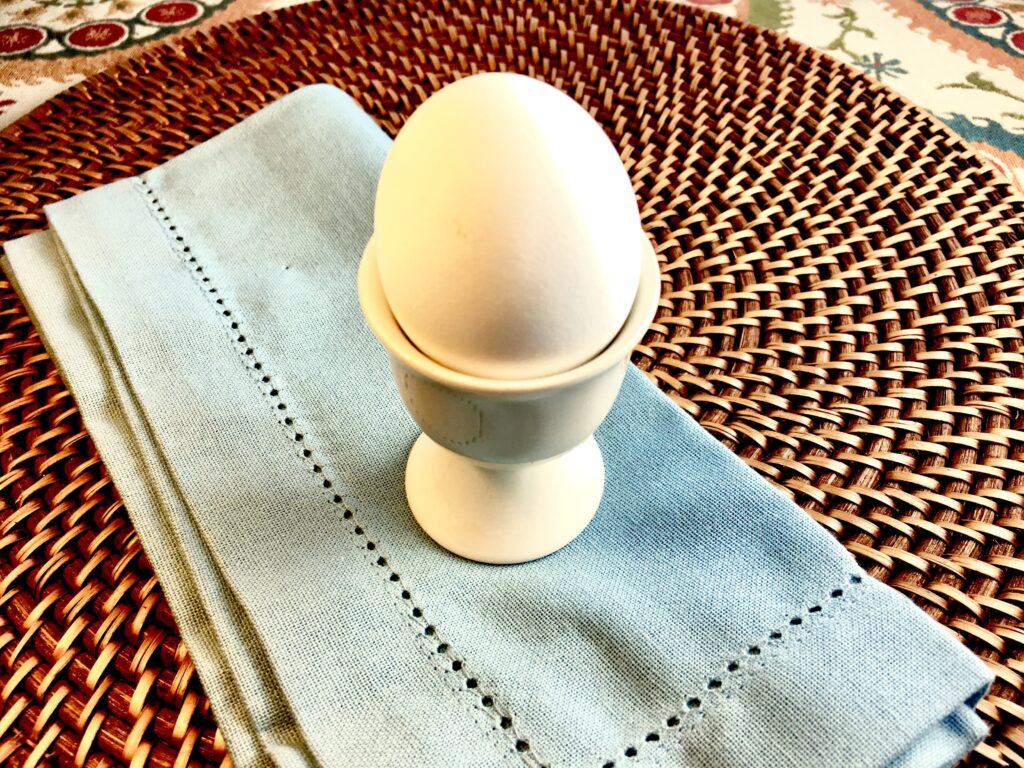
The Perfect Boiled Egg
Description
This method makes perfect hard boiled eggs every time!!
Ingredients
eggs
water
big pot with a lid
Instructions
*First of all, if you don’t want your shells to be too hard to peel creating a pocked boiled egg–missing chunks of the whites that would not release from the shell–do not use super fresh eggs. Let them sit in your fridge for a few days after purchase. This will allow for the membrane on the underside of the shell to weaken a little, making peeling MUCH easier.
1- Fill a pot with water and place on the stove top. Set the temperature to high. Carefully place the desired amount of eggs into the pot, making sure the water covers all of the eggs by at least an inch.
2-Bring the pot to a boil, but DO NOT continue to boil. Once the water begins to boil remove pot from the heat and put the lid on. Set your timer for 12- 15 minutes, depending on how you like your yolk. I usually set my timer for 13 minutes.
3-When the 12- 15 minutes is done–carefully drain the hot water off and replace with cold water and ice cubes. This will stop the cooking. If the ice melts, add more. The water should be icy cold.
4-After about 10-15 minutes, your eggs should be completely cooled. You can now easily peel your eggs and serve immediately or place in a Ziploc bag for later. I like to write the date on the bag. They are good for 1 week in your refrigerator.
if you go on you tube and search for Alton Brown hard cooked eggs. He steams his, I tried this for the first time last week and they where perfect and peeled so easy. I am hooked. Plus steaming takes up less energy.
Thank Dee–That is great idea!
Thanks for the tip Sharon–I will have to try that and see if it helps on even fresh eggs:) I hate it when they won’t peel nicey–so frustrating!
If you still have trouble peeling , slide a teaspoon between the shell and egg. I don’t use ice, I just refresh the cold water.
I found a great tip through Pinterest. Add 1/2 tsp. baking soda to the water when you boil them. It’s supposed to raise the pH of the water and make the eggs easier to peel. I tried it the other day and they did peel easier! I’ve always cooked them like you mentioned and then I shock them with cold water and ice, but still had a difficult time with peeling. This time was so much easier!
Thnx for the tips Mel! I really needed that too… And just in time! 🙂
What a miracle tip! Thank you! I think my deviled eggs this year will look 10x better with eggs that will peel away cleaner.
What a miracle tip! Thank you! I think my deviled eggs this year will look 10x better with eggs that will peel away cleaner.