

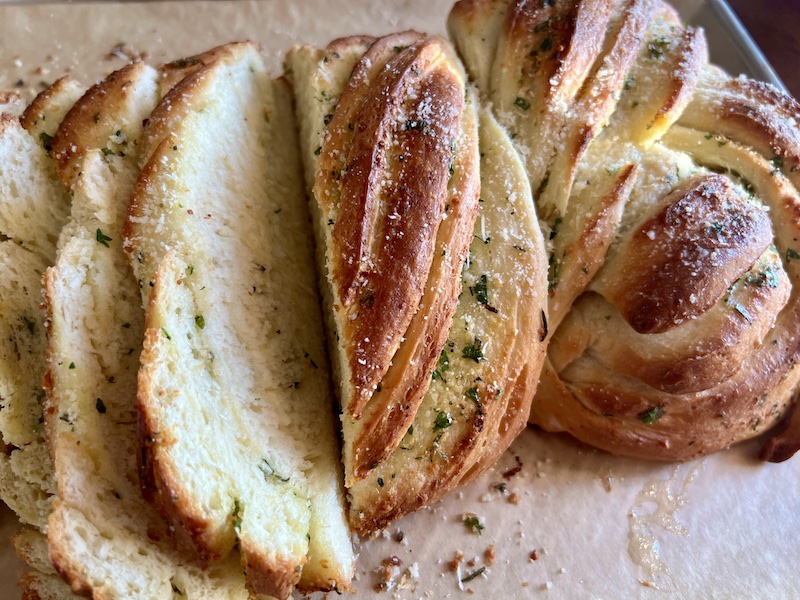
My Mom shared this Garlic Herb Swirl Bread recipe with me last time I visited her and I could not wait to make it when I got home. I thought it not only looked tasty but so pretty too! It was actually easy and fun to make and I was not disappointed in the results! Not only is it a beautiful loaf but it tastes fantastic too! A bonus is the way it fills your kitchen with the most delicious smell as it bakes.
The impressive shape of this garlic herb swirl bread looks a lot more complicated than it actually is. I took pictures of each step to try to break it down for you.
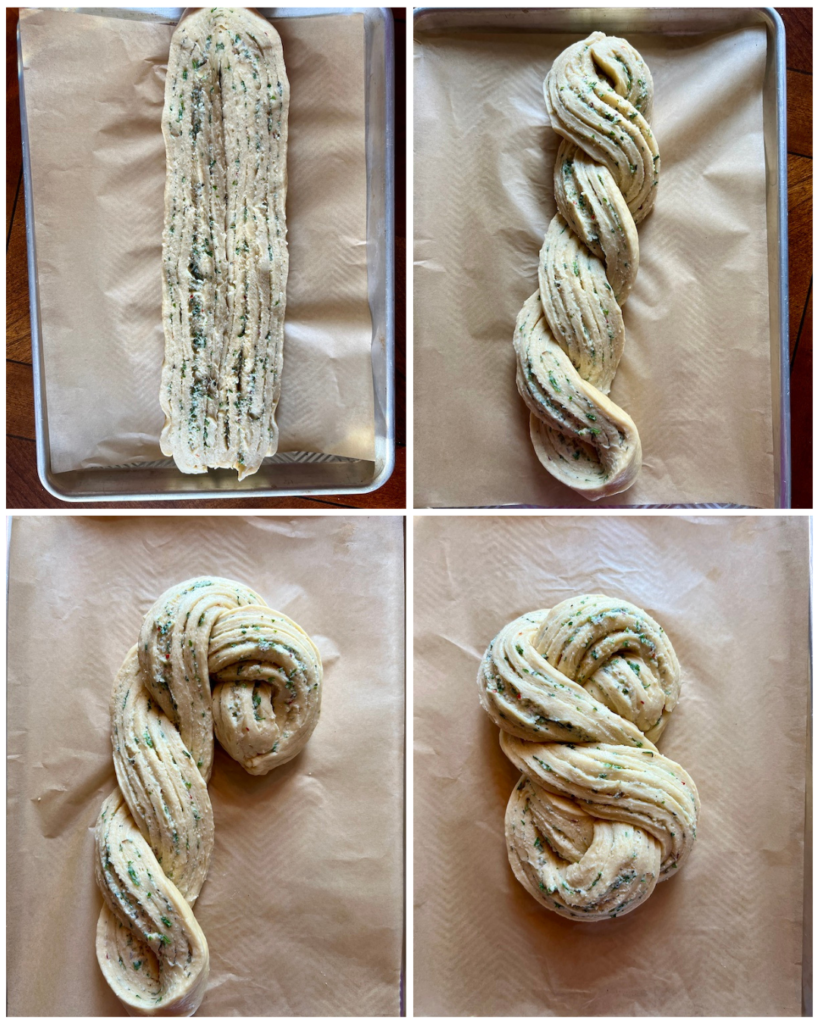
See what I mean? It looks hard to form but in actuality it is really quite simple. I served this bread with some Baked Ziti and Olive Garden Salad but I think it would be great along side a hearty main dish salad (like my favorite Chicken Poppyseed Salad) or a soup like Creamy Chicken Chowder or the BEST and easiet Tomato Soup recipe here! Anyway you serve it, trust me…your family and friends will love it!
I will say this bread was best the day of baking. Thankfully it was so good that we did not have much left anyway. It is definitely a “show stopper” and would be perfect to serve for company or a special occasion.
I hope you enjoy it as much as we do! Happy Baking:)
Garlic Herb Swirl Bread
Description
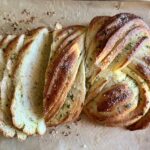
Garlic Herb Swirl Bread is a gorgeous and delicious loaf that is packed full of wonderful flavors that everyone loves.
Ingredients
-
3 ½ – 4 cup all-purpose flour
-
1 pkg. active dry yeast (2 1/4 tsp.)
-
¾ cup milk
-
6 tablespoon butter, softened
-
2 tablespoon sugar
-
1 teaspoon kosher salt
-
3 eggs, lightly beaten
-
¼ cup grated Parmesan cheese
-
3 garlic cloves, minced
- 1/4 cup fresh parsley or 1 Tablespoon dried (If you have fresh basil, oregano or thyme you could add them)*see note
-
1 teaspoon Italian seasoning
Instructions
- In a large bowl stir together 2 cups of the flour and the yeast. In a small saucepan combine milk, 2 Tbsp. of the butter, the sugar, and 1 tsp. kosher salt. Heat and stir until warm (120°F to 130°F). Add milk mixture and eggs to flour mixture; stir until combined. Stir in as much of the remaining flour as you can.
-
Turn dough out onto a lightly floured surface. Knead in enough of the remaining flour to make a soft dough that is smooth, lightly tacky, and elastic (about 3 minutes). Shape dough into a ball. Place in a lightly greased bowl, turning to coat surface of dough. Cover and let rise in a warm place until nearly double in size (about 1 hour).
-
Meanwhile, combine remaining 4 Tbsp. butter, Parmesan, garlic parsley and Italian seasonings.
-
Line a baking sheet with parchment paper. Punch dough down. Turn out onto a lightly floured surface. Cover; let rest 10 minutes. Roll dough into an 18×12-inch rectangle. Spread herb butter over dough, leaving a 1-inch border on one long side. Roll up rectangle, starting from filled long side; seal seam with fingertips. Using a serrated knife, cut roll in half lengthwise, leaving an inch intact at one end. Turn dough strips cut sides up; carefully twist over each other. Pinch ends together.
-
Starting at top, coil the rope like a snake, stopping halfway. Coil other half of rope in opposite direction to create a tight S shape. Transfer loaf to prepared baking sheet. Lightly cover with greased plastic wrap and let rise in a warm place until nearly double in size (about 45 minutes).
-
Preheat oven to 375°F. Bake 30 minutes or until golden brown and a thermometer registers 200°F. Brush warm bread with melted butter. Makes 12 servings.
Notes
In the summer when I have fresh herbs, I like to add more herbs. This part of the recipe is very flexible and you can add more or less herbs to your liking.
Recipe Source: Adapted from Better Homes and Gardens
HI Sharon,
Could you google the metric measurements? I wonder if there is an online calculator.?? Not sure. I am unfamiliar with that.
Hi. I’m from Singapore …and really want to try this recipe. But cld you give the metric measurements?
Esp the butter. How many grams is 6 tblspns?
Thanks
This a FABULOUS recipe! This bread is soft, moist, flavorful and festive. I made some with cinnamon and sugar for cinnamon roll twist and also made it with drained sun-dried tomatoes, parmesan and Italian herbs. It is my favorite bread recipe! 😍